How to Cut Freezer Paper with the Cricut Explore

How to Cut Paper with the Cricut Explore | MeanRightHook.com

I always wanted to get in to screen printing but there's just so many steps and lots of things to buy to get started. A few years ago I heard about freezer paper and how to use it to make stencils for t-shirts. Back then I had to use an Exacto knife to cut out my designs. It's so much easier now being able to do it with my Cricut. And it is really easy, I promise.

Here's what you need:
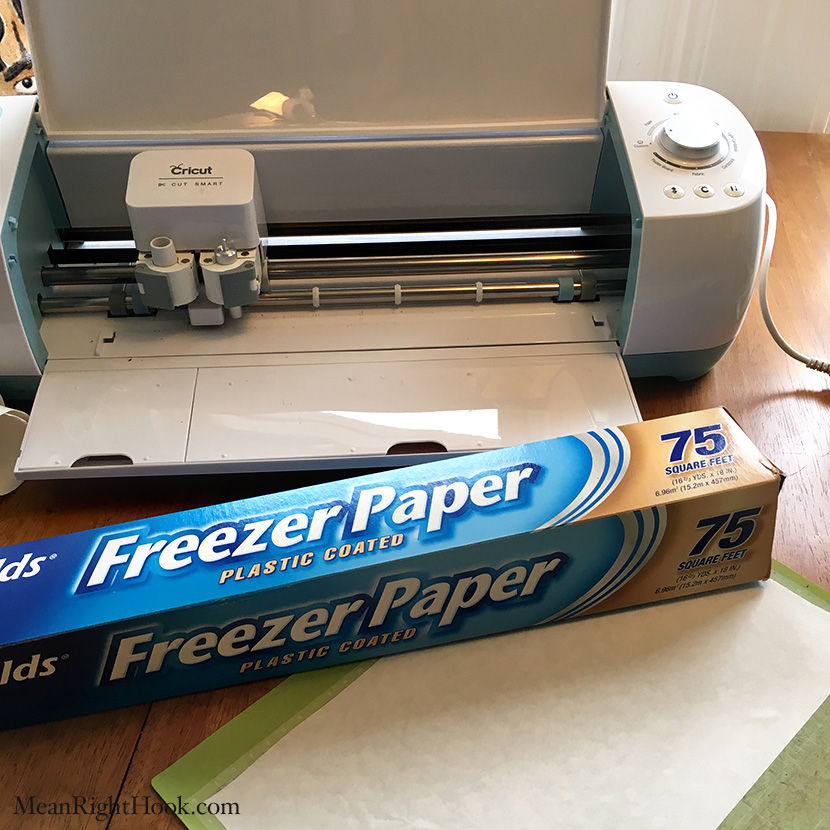
1. Freezer Paper
   – I bought mine at the grocery store in the storage bag/foil isle but you can also get it on Amazon.


2. Fabric Paint
   – I used actual fabric screen printing ink. I found mine at Dick Blick but again Amazon is your friend. Just make sure you're buying ink for fabric not paper.


4. Foam Craft Brush
   – I picked mine up at Jo-Ann's.


3. Standard Grip Cricut Mat
   – It's my go to for cutting all things really


4. An item to print on
   – I got this shirt from Forever21 for $4 and it worked great! I've also used this method on canvas tote bags.

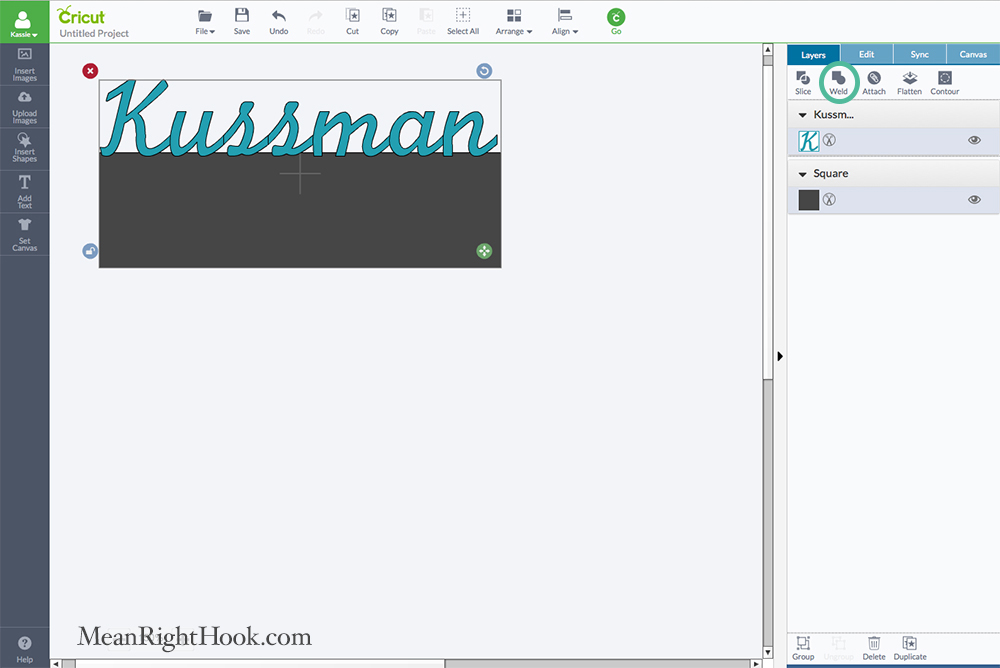
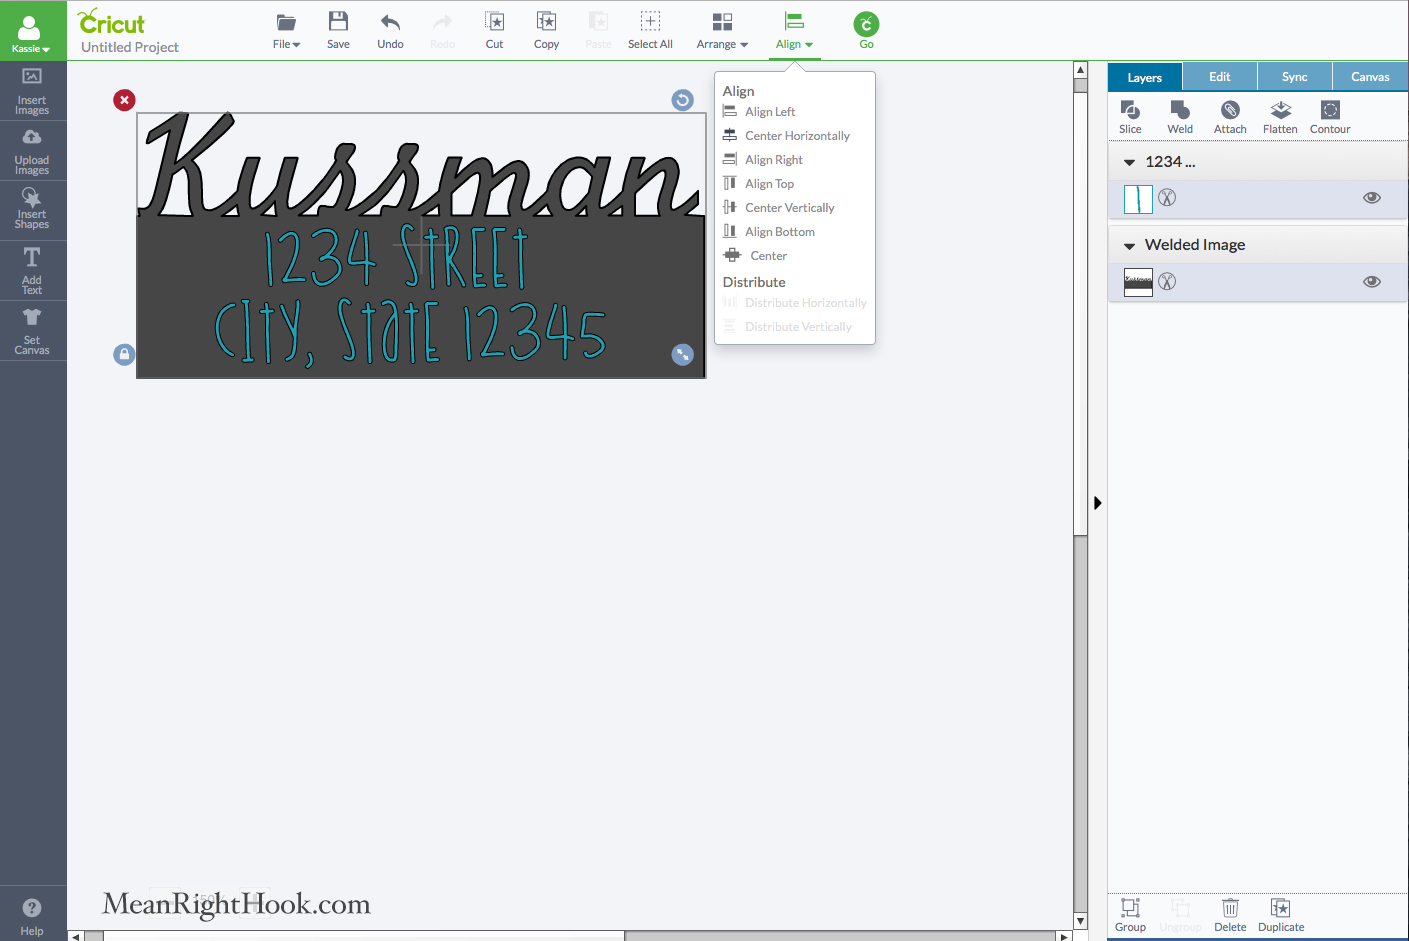
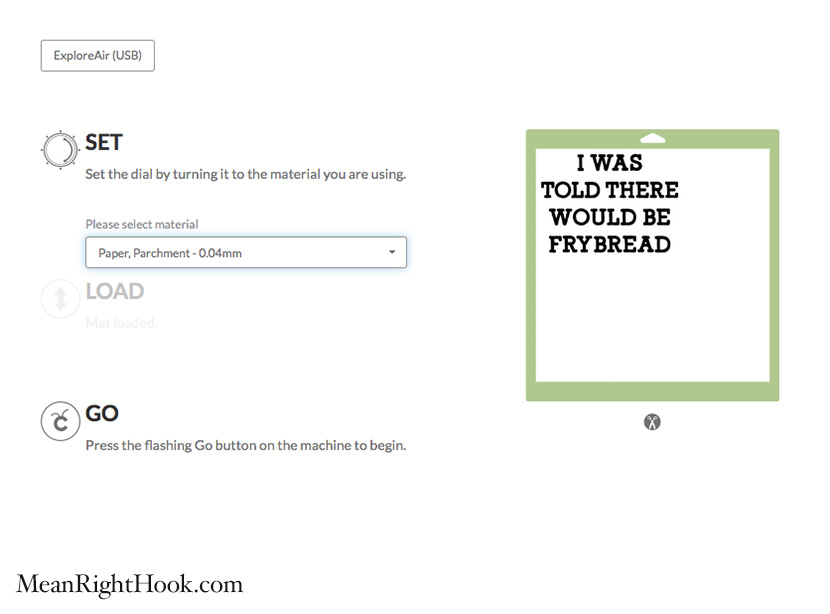
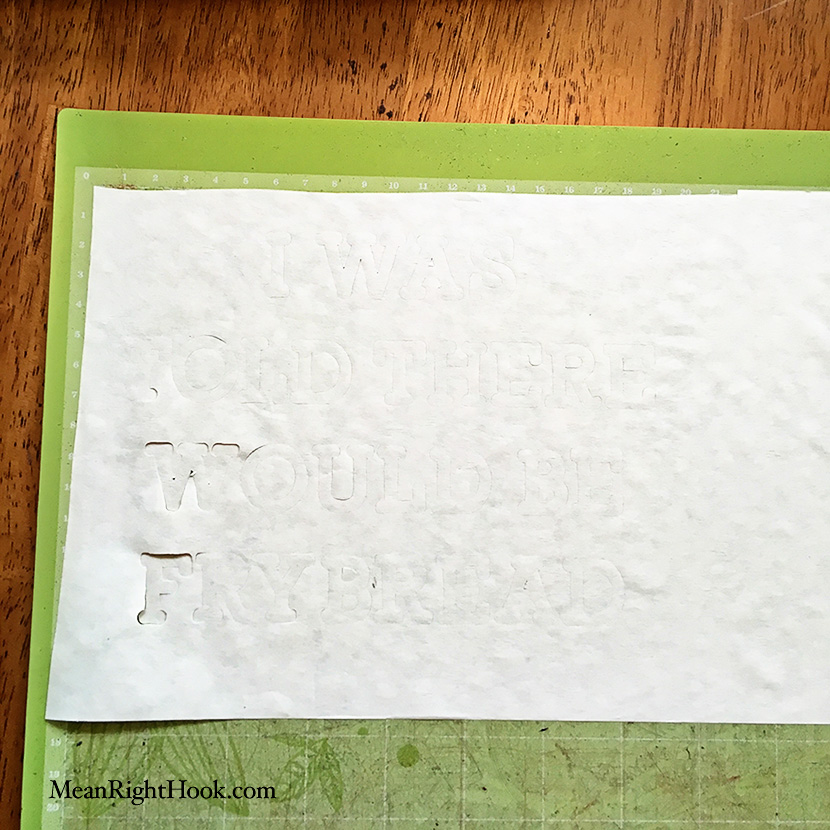
• First, cut out your freezer paper to fit on your mat. Then you'll place the freezer paper SHINY SIDE DOWN on the mat. So no need to mirror your design. 

• Send your design to cut and change your material to Paper, Parchment - 0.04mm

• Then weed out your design and place it on your shirt (SHINY SIDE DOWN). Iron the freezer paper to your shirt. I used the cotton setting on my iron. Make sure it's totally adhered, with no gaping between the stencil and the shirt. You don't want any ink bleeding around your cut lines.

• Next place something in between the layers of the shirt. You don't want ink to bleed through to the other side. Then paint your ink on using your foam brush.

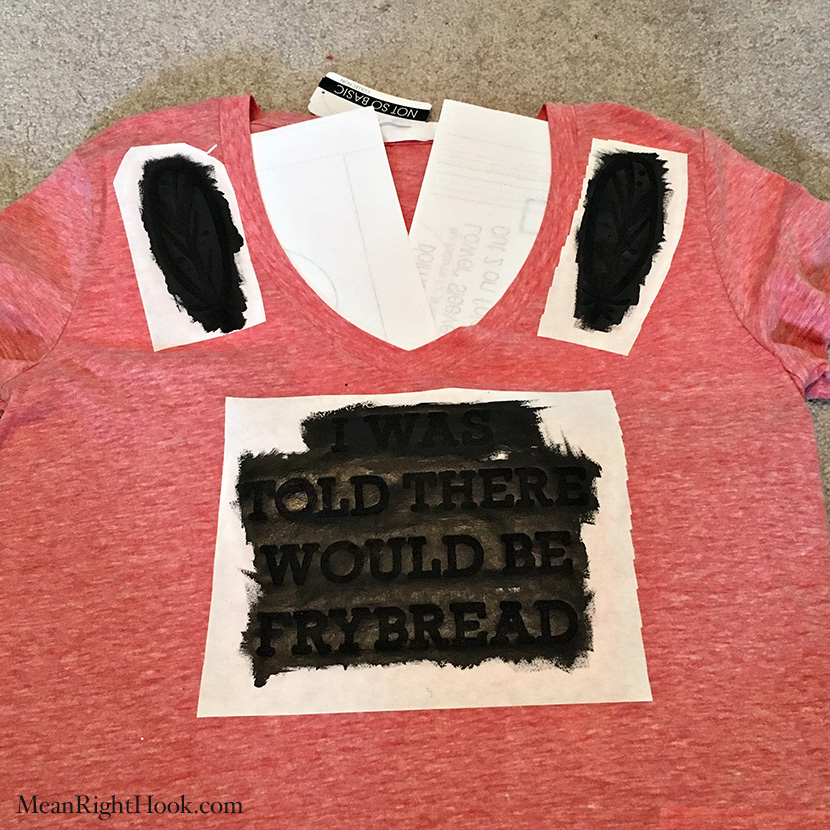
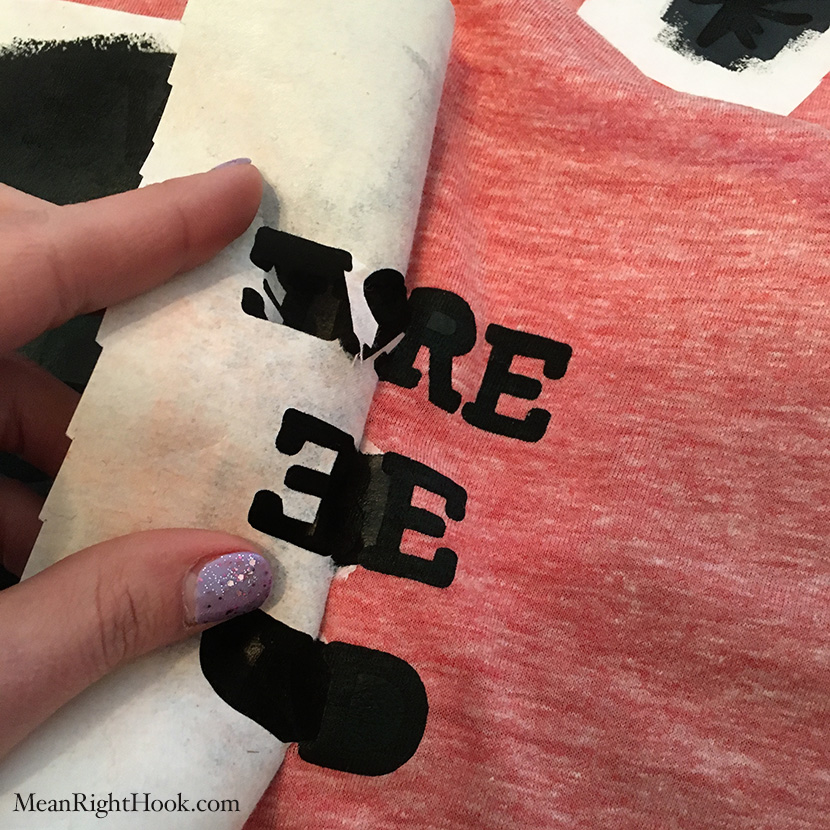
• I let mine dry for about 30 minutes just so the ink was dry enough that peeling the paper back wouldn't smear it around.

• The last step is to heat set it with the iron again to make sure the ink is good and set. 

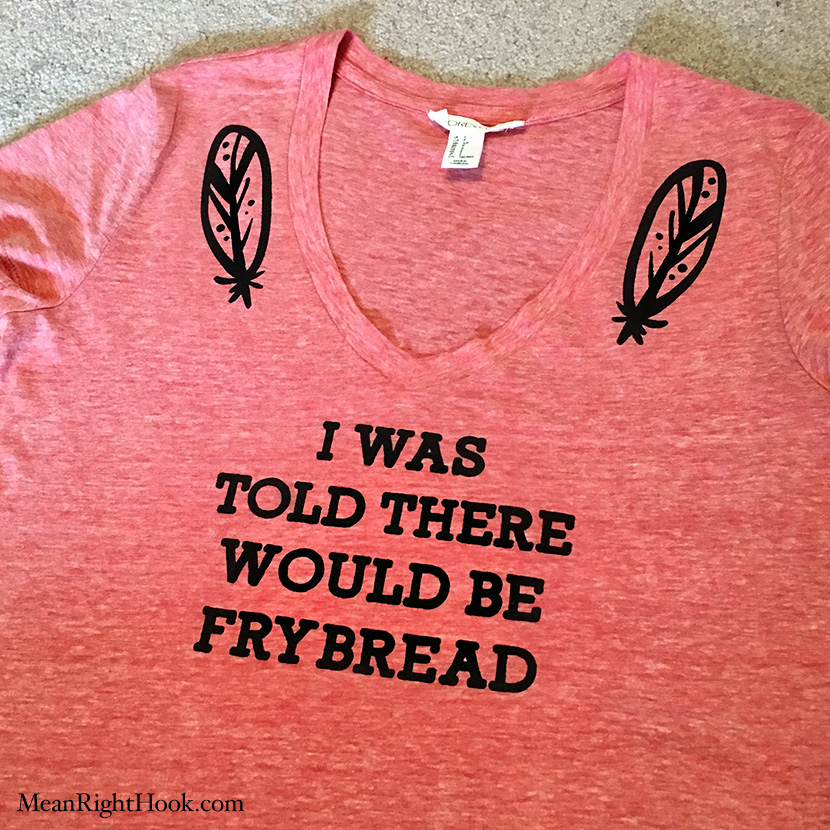
I LOVE my new shirt! I can't wait to wear it to the next pow wow! I really like the look of actual ink instead of HTV. It has a softness that is so different from HTV. I already have more ideas of things I want to make next.

I'd love to see your freezer paper projects! Tag me on Instagram, @MeanRightHookDesign, so I can see what you've been making! 

Check out the latest digital designs in my shop

A Doll for Raven

I wanted to try to make a small doll for Raven. One that she could carry around that wasn't too big and fit in her hands well. I'm also not great at sewing, so it couldn't be too complicated. I decided to try printing a doll design on fabric and sewing it together.

DIY Printable Doll Tutorial | MeanRightHook.com

I started off by using SpoonFlower's doll template and editing it in Photoshop. I tried to make her look more like Raven and I separated the front and the back of the doll so I could print each part on it's own 8.5x11 piece of fabric. 

DIY Printable Doll | MeanRightHook.com

Then I cut out two 8.5 x 11 sheets of freezer paper, ironed it on to white cotton fabric and cut out the fabric.

I loaded one fabric sheet into the back tray of my inkjet printer and printed the front of the doll then repeated that again for the back of the doll. Once she was printed out I waited about 30 minutes for the fabric to dry so I wouldn't smudge the ink. Then I cut her out and removed the freezer paper backing. 

Placing right sides together, I sewed around the doll, leaving a small opening on her side so I could turn her right side out and stuff her. Her legs were the most difficult to turn right side out since they're so skinny. I used a crochet hook to help get them out and that worked great.

After she was stuffed, I hand-sewed her side opening and she was done! I think Raven likes her new friend. I'm pretty sure she's telling her all her baby secrets because she likes to talk to her a lot.

Making Return Address Labels with your Cricut Explore

I saw this great tutorial on how to make return address labels with your Silhouette and I really wanted to try it on my Explore. It was very easy and it only took a few minutes.

Making Return Address Labels with your Cricut Explore at MeanRightHook.com

1. First draw a square

Making Return Address Labels with your Cricut Explore at MeanRightHook.com

2. Unlock it to make it a rectangle. I made mine 3.5 X 1 (I will say these are a little big, next time I’ll make them more like 2.5 x 1)

Making Return Address Labels with your Cricut Explore at MeanRightHook.com

3. Then write out your last name in the font of your choice. I picked Pilgi from my system fonts.

Making Return Address Labels with your Cricut Explore at MeanRightHook.com

4. Select both your name layer and the rectangle layer, then weld them together

Making Return Address Labels with your Cricut Explore at MeanRightHook.com

5. Next write out your address. I picked a cute san serf font. Then select both the label layer and the address layer and center horizontally align them so the address is on there straight. 

Making Return Address Labels with your Cricut Explore at MeanRightHook.com

6. I wanted to use the Print Then Cut feature, so I changed my address to Print.

Making Return Address Labels with your Cricut Explore at MeanRightHook.com

7. I’m using Firefox, so I know my Print Then Cut dimensions are 6”x8.5”

Making Return Address Labels with your Cricut Explore at MeanRightHook.com

8. Then select both layers and click 'Attach' so the address stays on the layer when you go Print then Cut. You can change the label back to 'Cut', but I left it as print but changed it’s color to white. My printer, and most home printers, do not print white so it’s essentially doing the same thing. 

Making Return Address Labels with your Cricut Explore at MeanRightHook.com

9. Then duplicate the label as many times as you like or as many times as will fit in your printable area. Again, I will say I think mine could have been smaller.

Making Return Address Labels with your Cricut Explore at MeanRightHook.com

10. Then select all and attach again.

Making Return Address Labels with your Cricut Explore at MeanRightHook.com

11. After you hit GO, click "More Mat Settings" and uncheck your bleed setting. You don’t need bleed for this project.

13 copy.jpg

12. Then print out your labels and cut! 

Easy peasy! If you want an even simpler way, just use the write feature for your address instead of the Print Then Cut. 

If this tutorial helped you out, Pin it on Pinterest so others can find it too! 

So Shrinky Dinks are still a thing

How to Cut Shrinky Dinks with the Cricut Explore

While looking for craft ideas on Pinterest I stumbled upon lots of cool jewelry made with Shrinky Dinks. I totally forgot about those! I never tried them as a kid but they looked like something that would work in my Cricut Explore. 

I went to Michael's to get them and I found there's lot of different kinds. I ended up getting the white printable pack. They were more expensive than the other ones but I had a coupon. I always have a coupon.

For my first project I wanted to make a birthday gift for a friend at my powerlifting gym. We both crochet and powerlift, which is some what of a strange combo. So we joke that we need to make club for the crocheting powerlifters. 

I designed us a sweet logo, then lightened the colors by 50% as it said to in the instructions. It looks really weird, but I promise it turns out okay. Then I uploaded it into Cricut Design Space. I also added a 1/8" hole to the top so I could add a keyring later, but a standard hole punch would have worked too. 

How to Cut Shrinky Dinks with the Cricut Explore

For cutting the Shrinky Dink material I made a custom material setting. I cranked the cut pressure to 340 and changed the multicut to 3x. I used my standard mat and standard blade for cutting. 

How to Cut Shrinky Dinks with the Cricut Explore

I hit GO and printed my design on the material and proceeded with the cut. It cut out really well. There was just one or two places where it didn't cut all the way though but it was really easy to snap right out. 

How to Cut Shrinky Dinks with the Cricut Explore

I then followed the instructions on the Shrinky Dink package on how to bake it. I set my oven to 350°, lined a cookie sheet with parchment paper and baked it printed side up. The instructions said to bake for 3-5 minutes but mine took a few minutes longer to completely flatten out. I'm so happy with how it turned out! Just to be safe I added a layer of matte acrylic sealer over it to make sure the ink doesn't wear off. I also cut out a cute little gift bag to put it in. I found the bag design in the Cricut subscription of images.

This made a really affordable and easy gift. I can't wait to make more things out of Shrinky Dinks! I've got to make up for all the time I never made them as a kid.