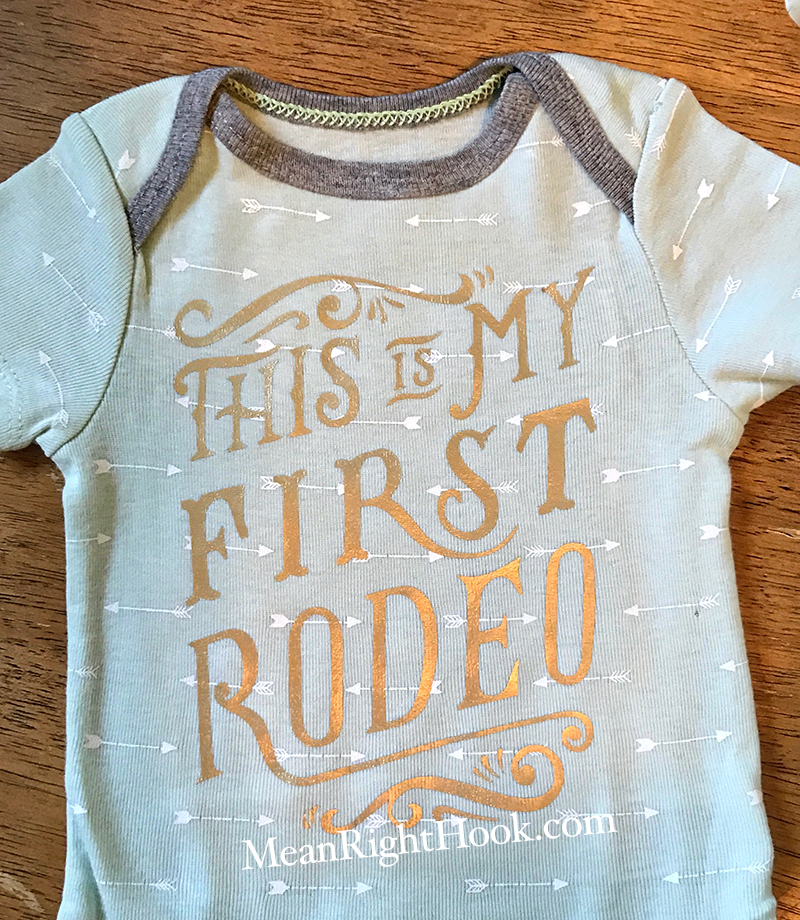
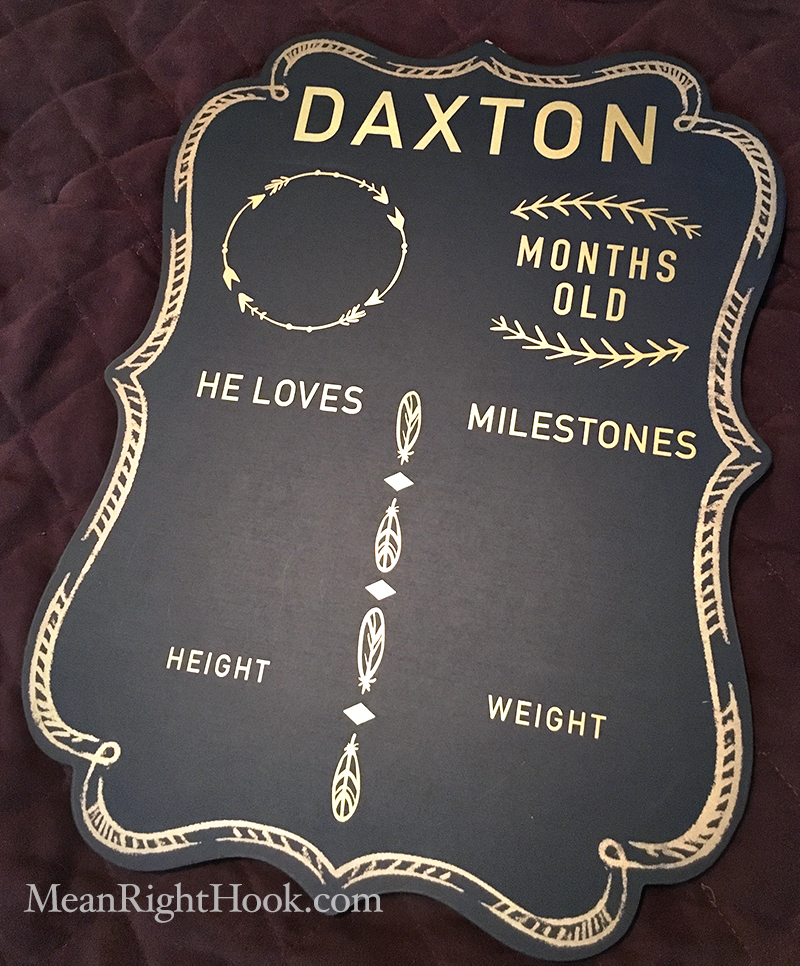
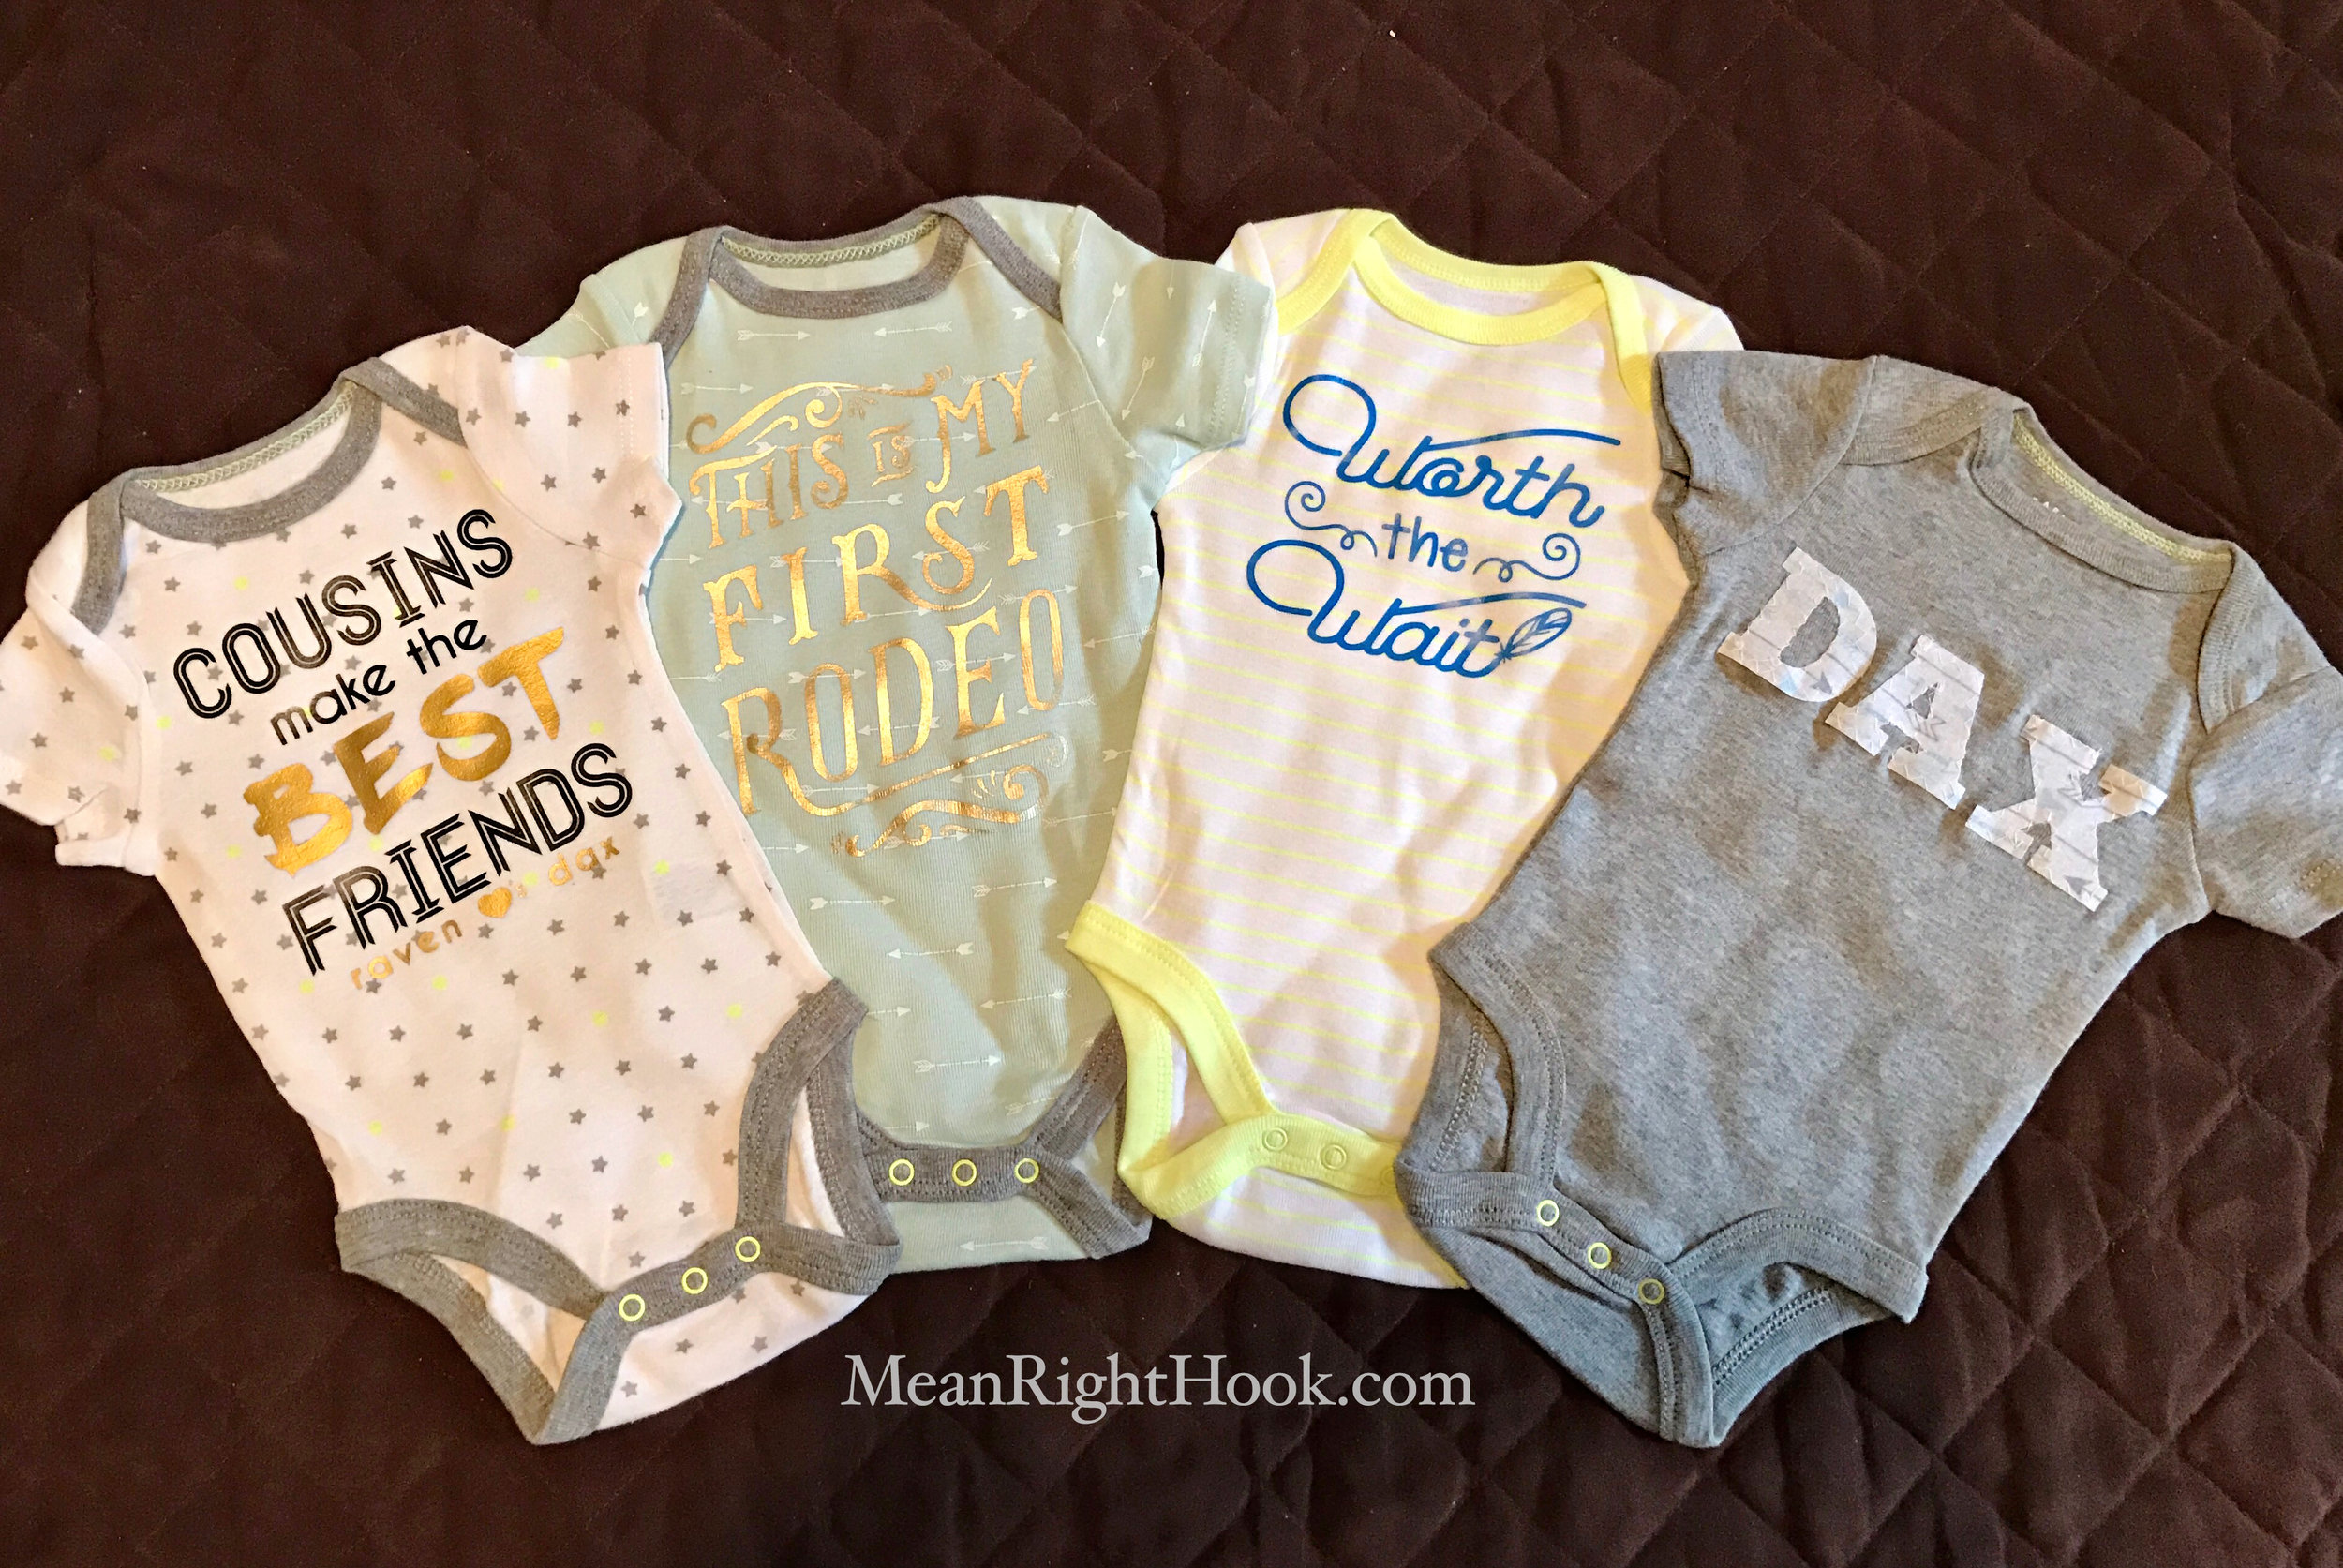
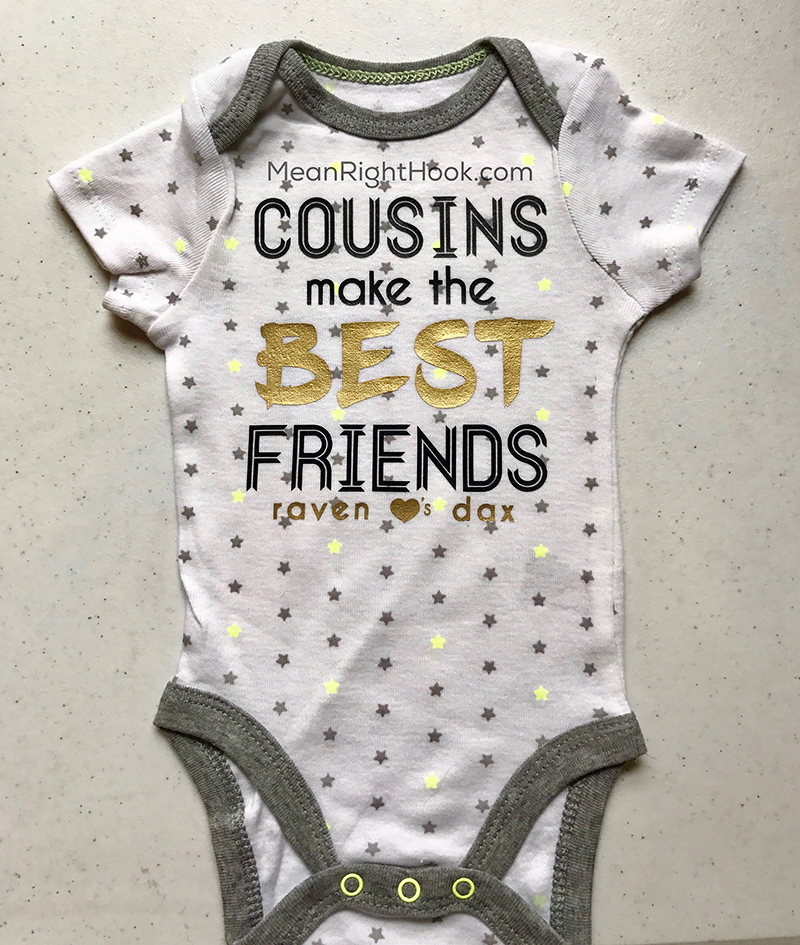
I love getting to craft for new babies! My sister-in-law is due at the end of the month and I can't wait to finally get to meet him! I whipped up a few onesies and a monthly stat board. I hope she loves everything.
Your Custom Text Here
I love getting to craft for new babies! My sister-in-law is due at the end of the month and I can't wait to finally get to meet him! I whipped up a few onesies and a monthly stat board. I hope she loves everything.

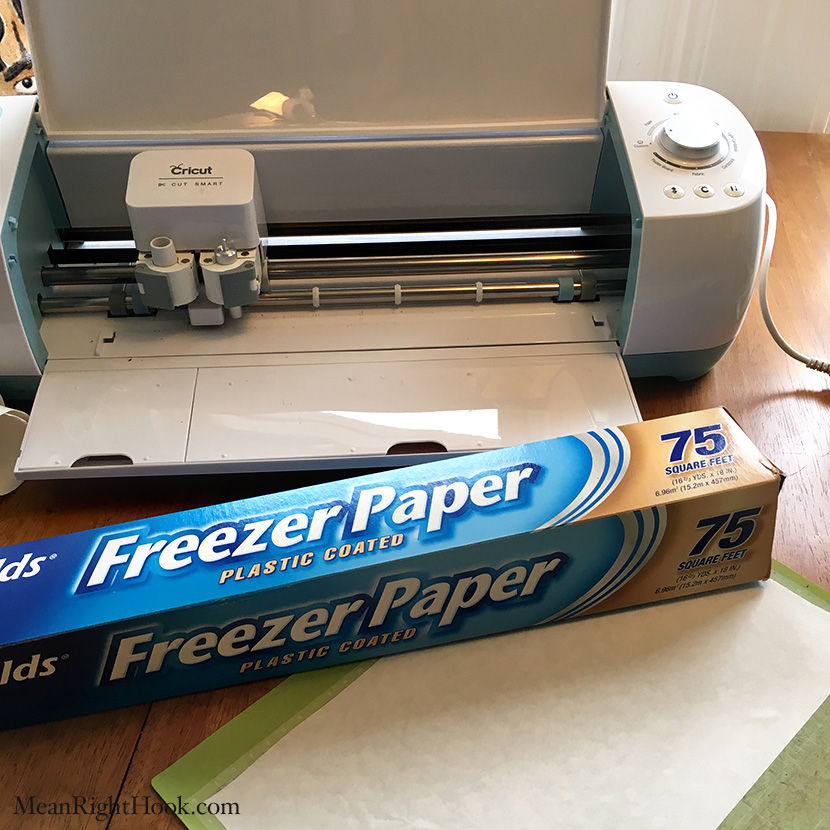
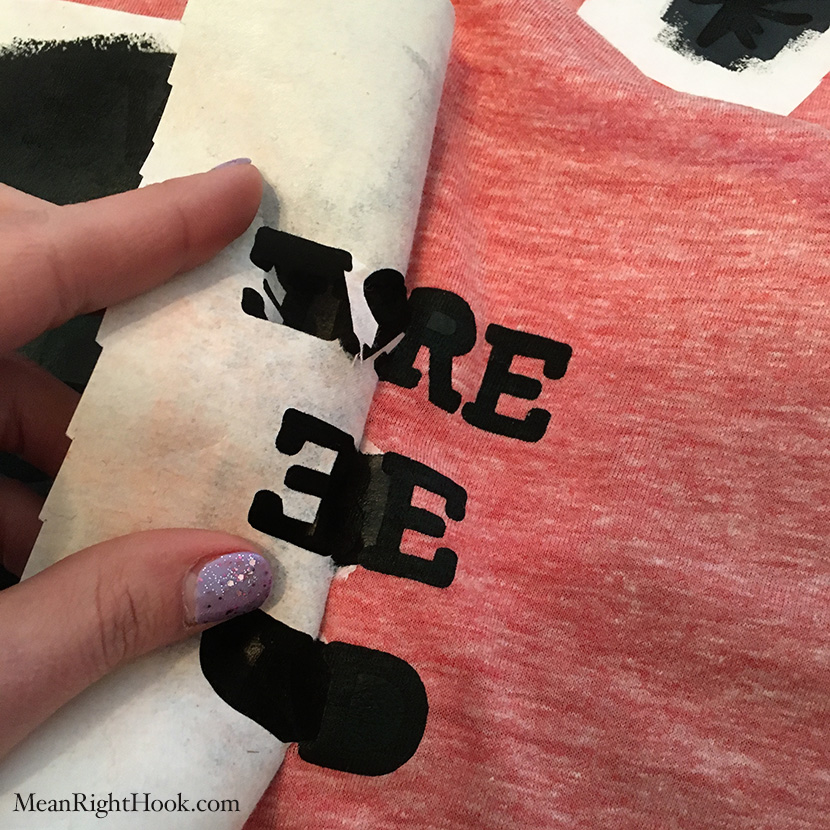
I always wanted to get in to screen printing but there's just so many steps and lots of things to buy to get started. A few years ago I heard about freezer paper and how to use it to make stencils for t-shirts. Back then I had to use an Exacto knife to cut out my designs. It's so much easier now being able to do it with my Cricut. And it is really easy, I promise.
Here's what you need:
1. Freezer Paper
– I bought mine at the grocery store in the storage bag/foil isle but you can also get it on Amazon.
2. Fabric Paint
– I used actual fabric screen printing ink. I found mine at Dick Blick but again Amazon is your friend. Just make sure you're buying ink for fabric not paper.
4. Foam Craft Brush
– I picked mine up at Jo-Ann's.
3. Standard Grip Cricut Mat
– It's my go to for cutting all things really
4. An item to print on
– I got this shirt from Forever21 for $4 and it worked great! I've also used this method on canvas tote bags.
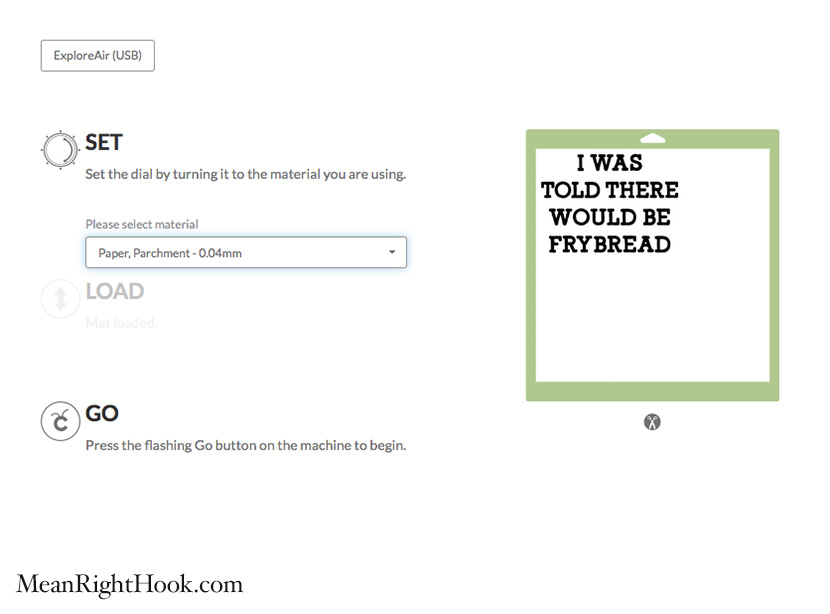
• First, cut out your freezer paper to fit on your mat. Then you'll place the freezer paper SHINY SIDE DOWN on the mat. So no need to mirror your design.
• Send your design to cut and change your material to Paper, Parchment - 0.04mm
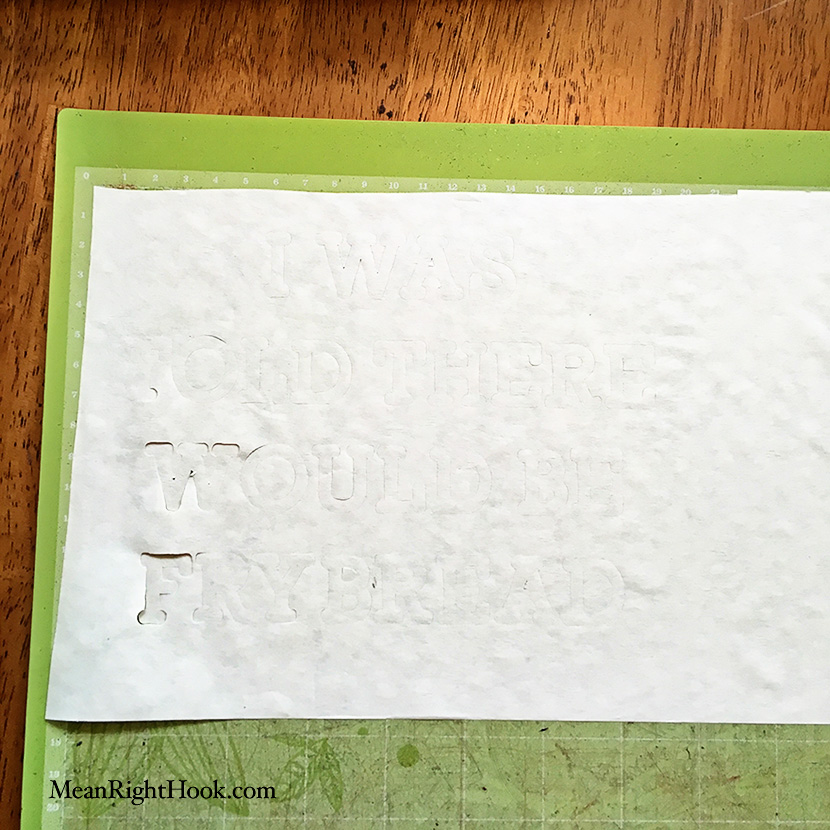
• Then weed out your design and place it on your shirt (SHINY SIDE DOWN). Iron the freezer paper to your shirt. I used the cotton setting on my iron. Make sure it's totally adhered, with no gaping between the stencil and the shirt. You don't want any ink bleeding around your cut lines.
• Next place something in between the layers of the shirt. You don't want ink to bleed through to the other side. Then paint your ink on using your foam brush.
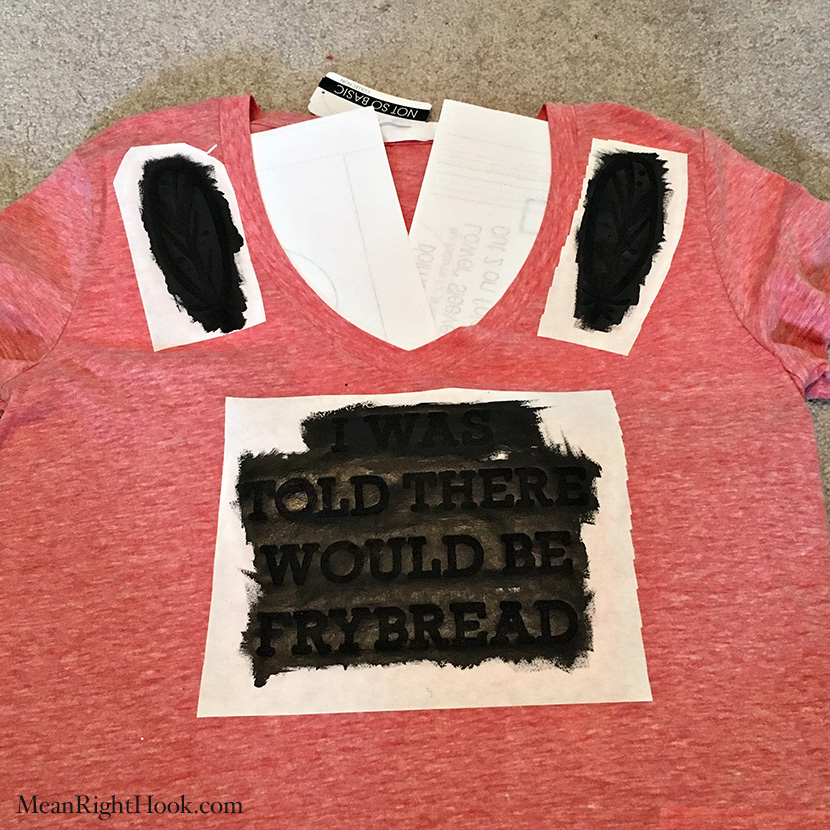
• I let mine dry for about 30 minutes just so the ink was dry enough that peeling the paper back wouldn't smear it around.
• The last step is to heat set it with the iron again to make sure the ink is good and set.
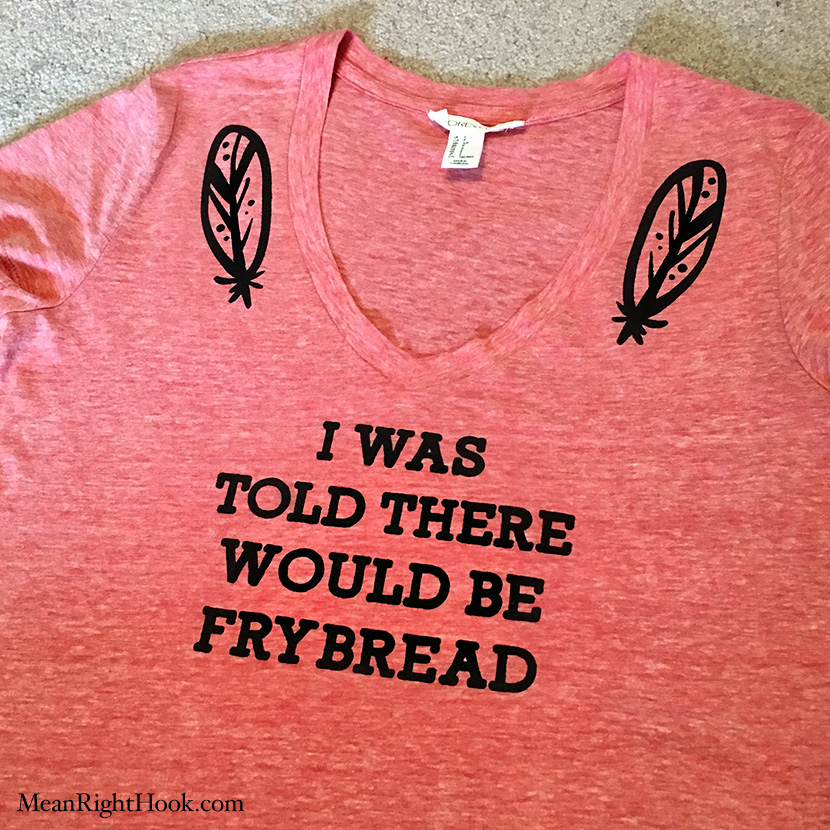
I LOVE my new shirt! I can't wait to wear it to the next pow wow! I really like the look of actual ink instead of HTV. It has a softness that is so different from HTV. I already have more ideas of things I want to make next.
I'd love to see your freezer paper projects! Tag me on Instagram, @MeanRightHookDesign, so I can see what you've been making!
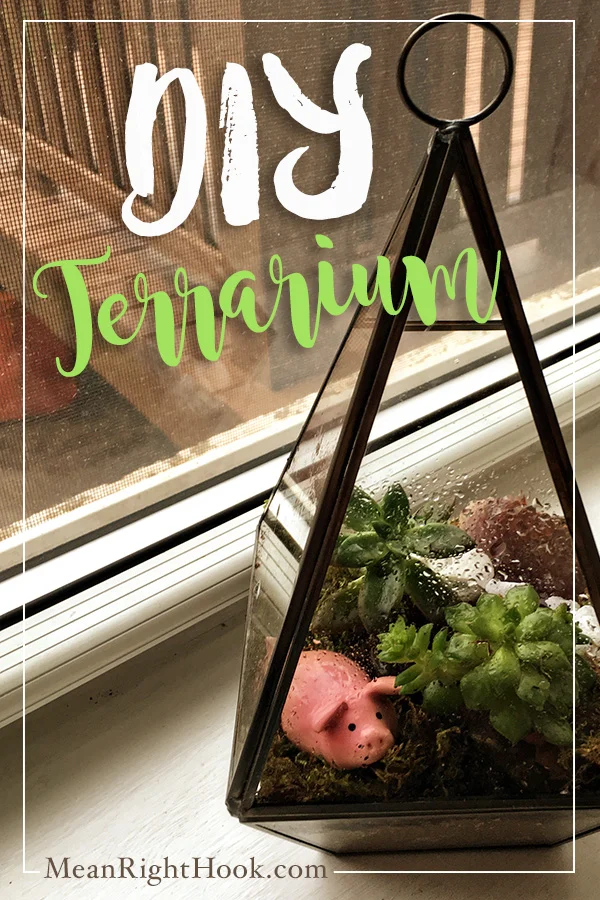
I've fallen in love with all the cute little terrariums I've been seeing around online and in a lot of stores. But man are they expensive! I've seen some run about $50! So I decided to try to make one myself. I definitely do not have a green thumb. I've never been able to keep a plant alive very long, but these seem pretty low maintenance.
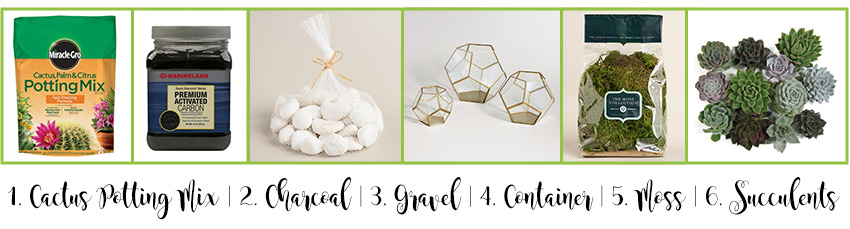
Here's what you need:
1. Cactus Potting Mix
2. Planting Charcoal
3. Gravel
4. Cute Container
5. Moss
6. Succulents
*optional: decorative miniatures* I got my little piggy from a craft fair.
• Start by adding a layer of gravel at the bottom of your container for drainage
• Then add a layer of charcoal and enough potting soil to be able to completely over the roots of your plants
• Plant your succulents in the soil
• Add your moss over the top of the soil and any decorations you like
• Lastly spritz your plants with a little water
I found everything to make my terrarium at Home Depot except my container. I found that at Jo-Ann's. I love how it turned out and it looks so cute in my bathroom! I totally need to make more now that I have all the supplies. These would make really cute gifts and it only took me about 30 minutes to do.
I'd love to see any terrariums that you make. Tag me in your instagram photos at @MeanRightHookDesigns

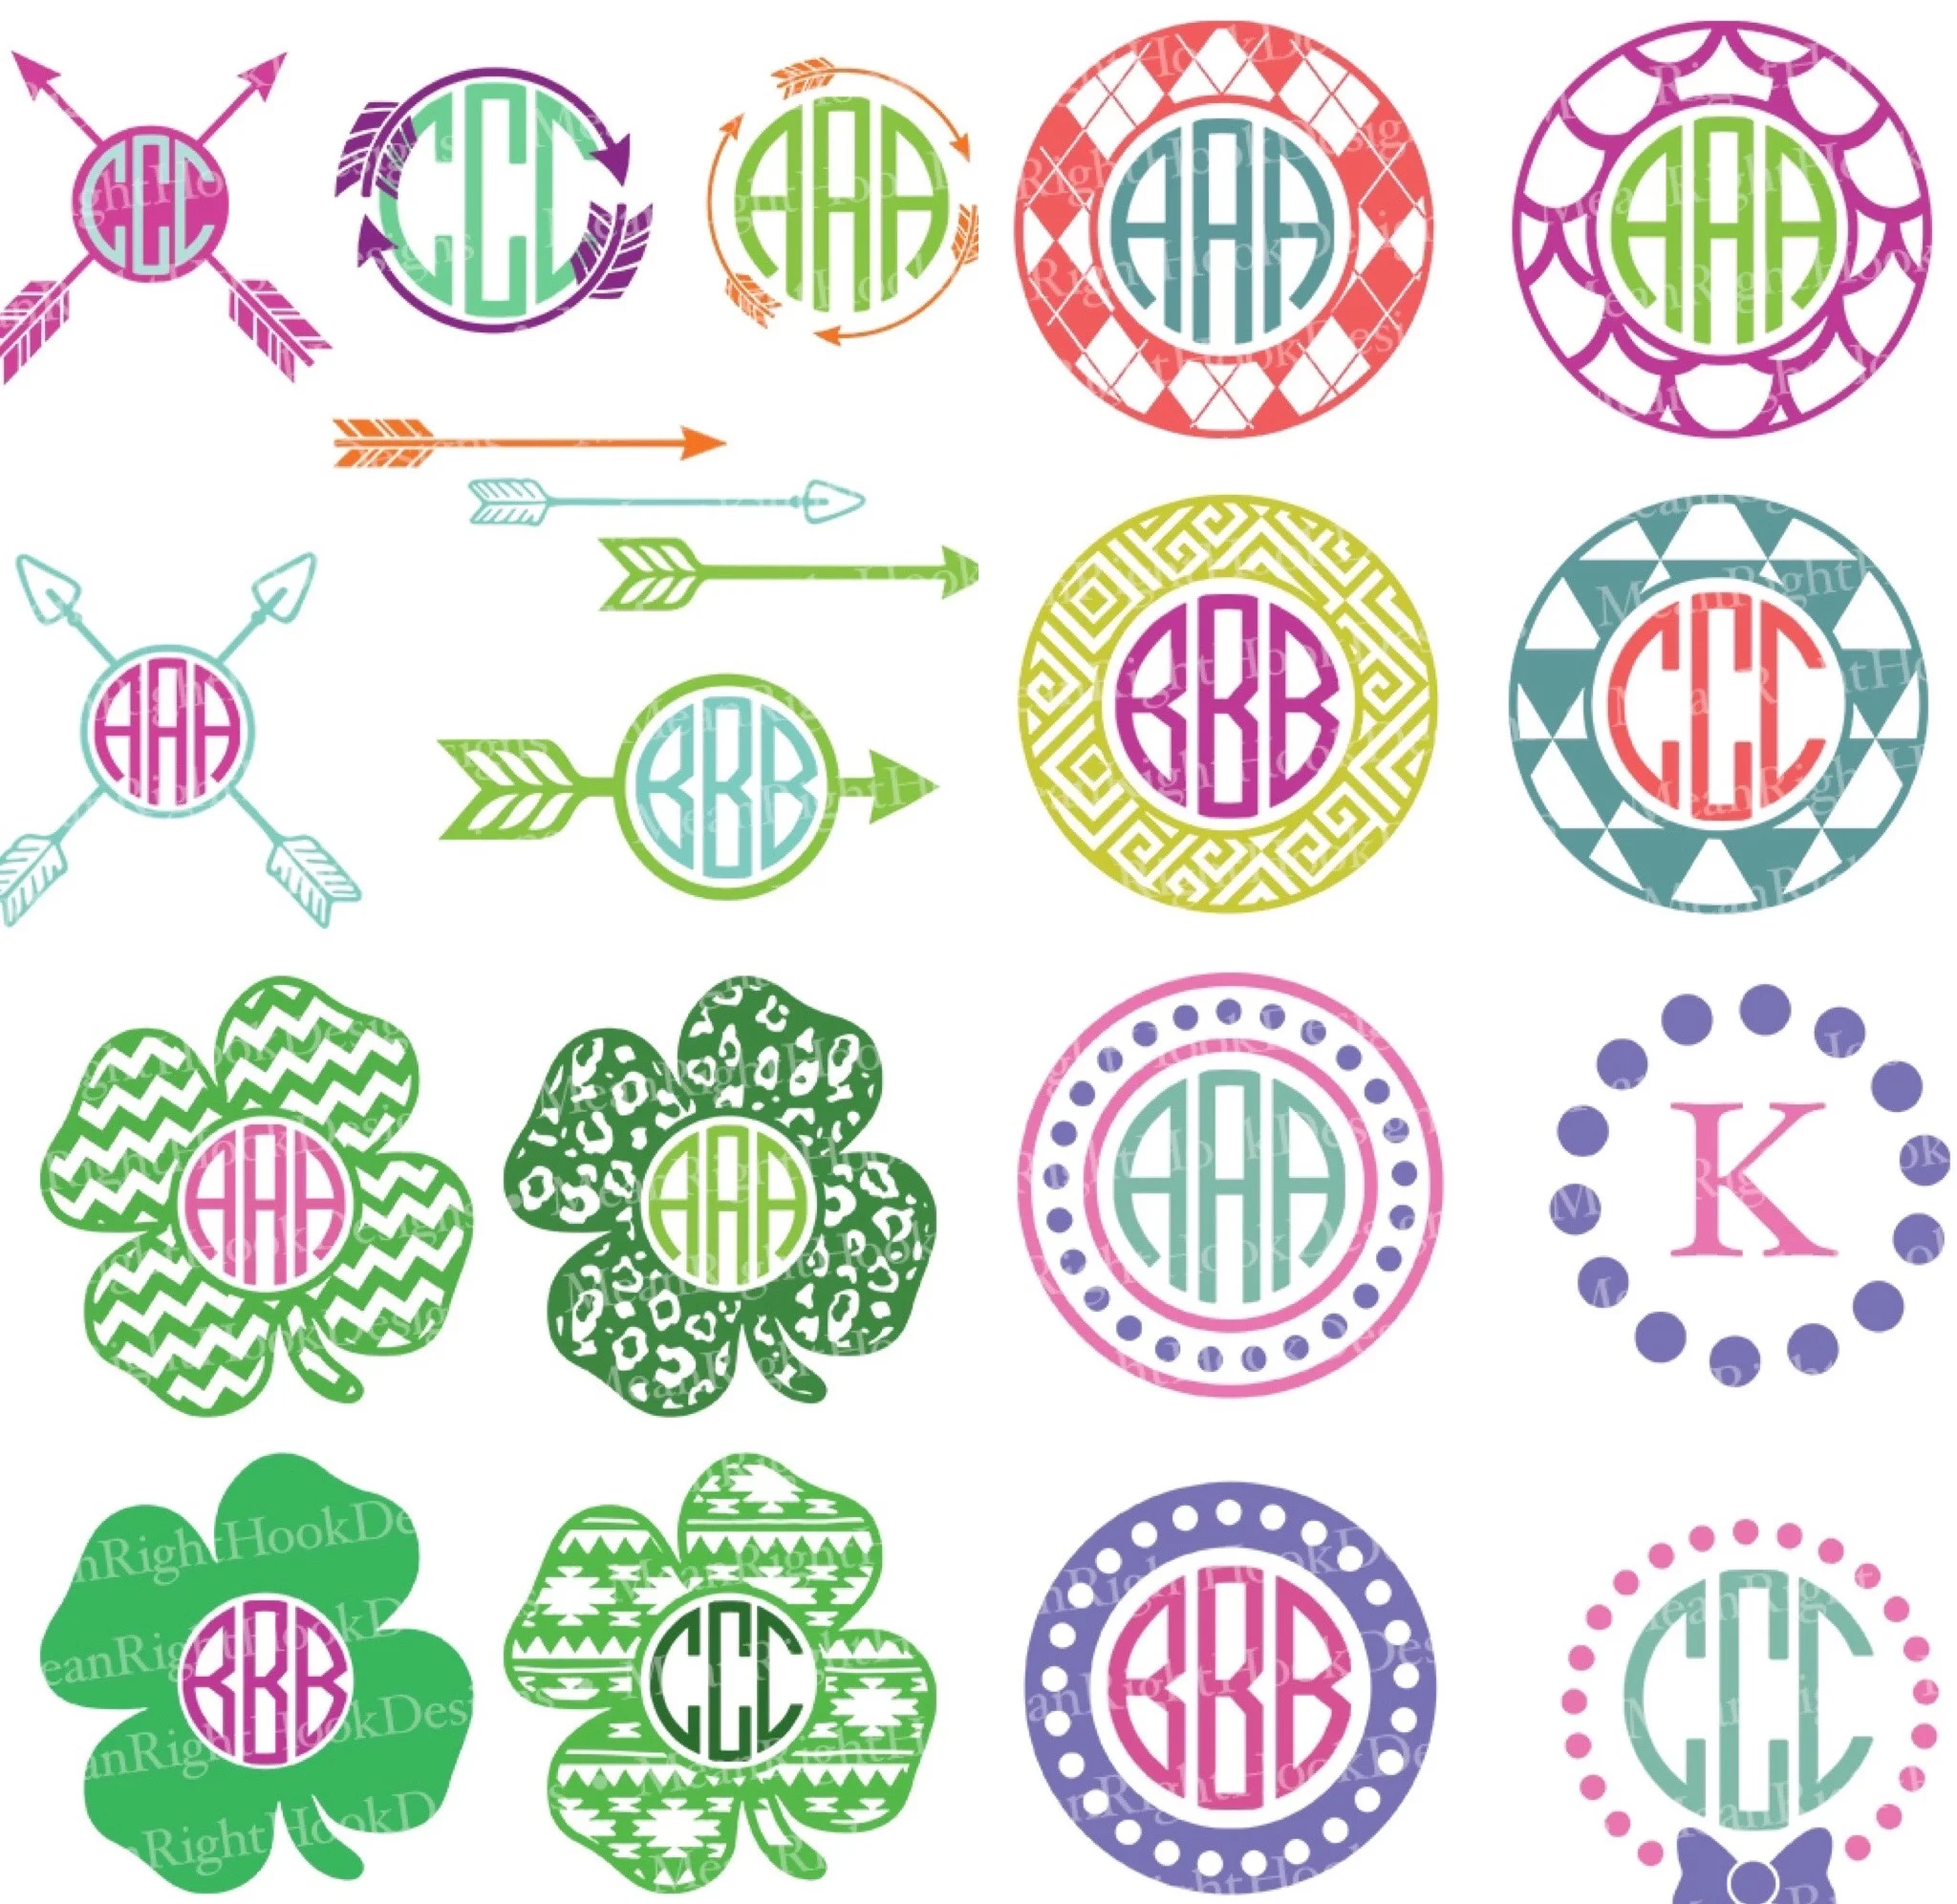
Hey guys! I just wanted to tell you about my awesome monogram collection over on Little Big Crafter. You get 17 different monogram frames with commercial usage licenses for only $9! It's such an amazing deal. And if you use code: MEANRIGHTHOOK you get 20% off. Hurry, the deal is over in 28 days!

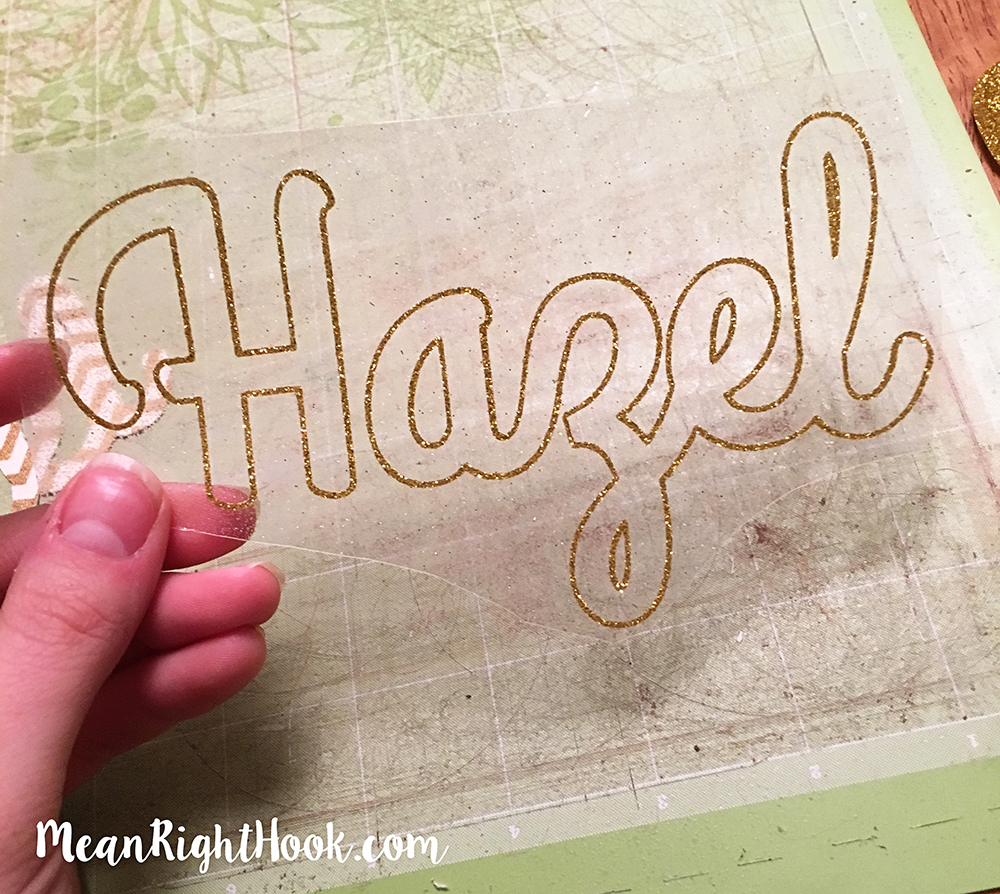
When I first bought my Cricut last year I knew I wanted to use it for cutting things like fabric and felt but from all the things I read on the internet it was difficult to do and it never came out right. After reading tons of blogs and watching countless YouTube videos I set out to cut fabric. Turns out it is super simple and it took me no time at all to make an awesome fabric appliqué.
Here’s a little step by step on how to do it yourself.
Things you need:
1. Heat N’ Bond Ultra hold - I picked up a package of this at Jo-ann’s
2. Fabric - I used regular quilting fabric
3. Regular cutting blade - I’ve had my machine for 8 months and haven’t changed the blade yet and it cut just fine. Just make sure there’s nothing stuck to it or the housing.
4. Standard Cutting Mat
5. An Iron and a sturdy surface to iron on - My ironing board is super flimsy so I iron on a scrap piece of wood I have lying around my craft room.
1. Cut out your fabric. Make it bigger than your design.
2. Place your piece of fabric on your Heat N’ Bond and cut around it.

3. Iron on the Heat N’ Bond to the wrong side of your fabric. Make sure to read the instructions on the packaging.
4. Once it’s completely adhered, place it Heat N’ Bond side DOWN on your cutting mat. Your mat needs to be sticky to hold your fabric in place. If it’s not your fabric could catch the blade and shift around.

5. Cut out your design! I used the Fabric, Printable setting in the custom cut settings.
6. Once it’s cut out, remove the paper backing from the Heat N’ Bond and iron it on to your garment. That’s all it takes!

Bonus: To make my fabric edges look more finished I cut an outline layer of glitter HTV and ironed that over the top of the fabric.
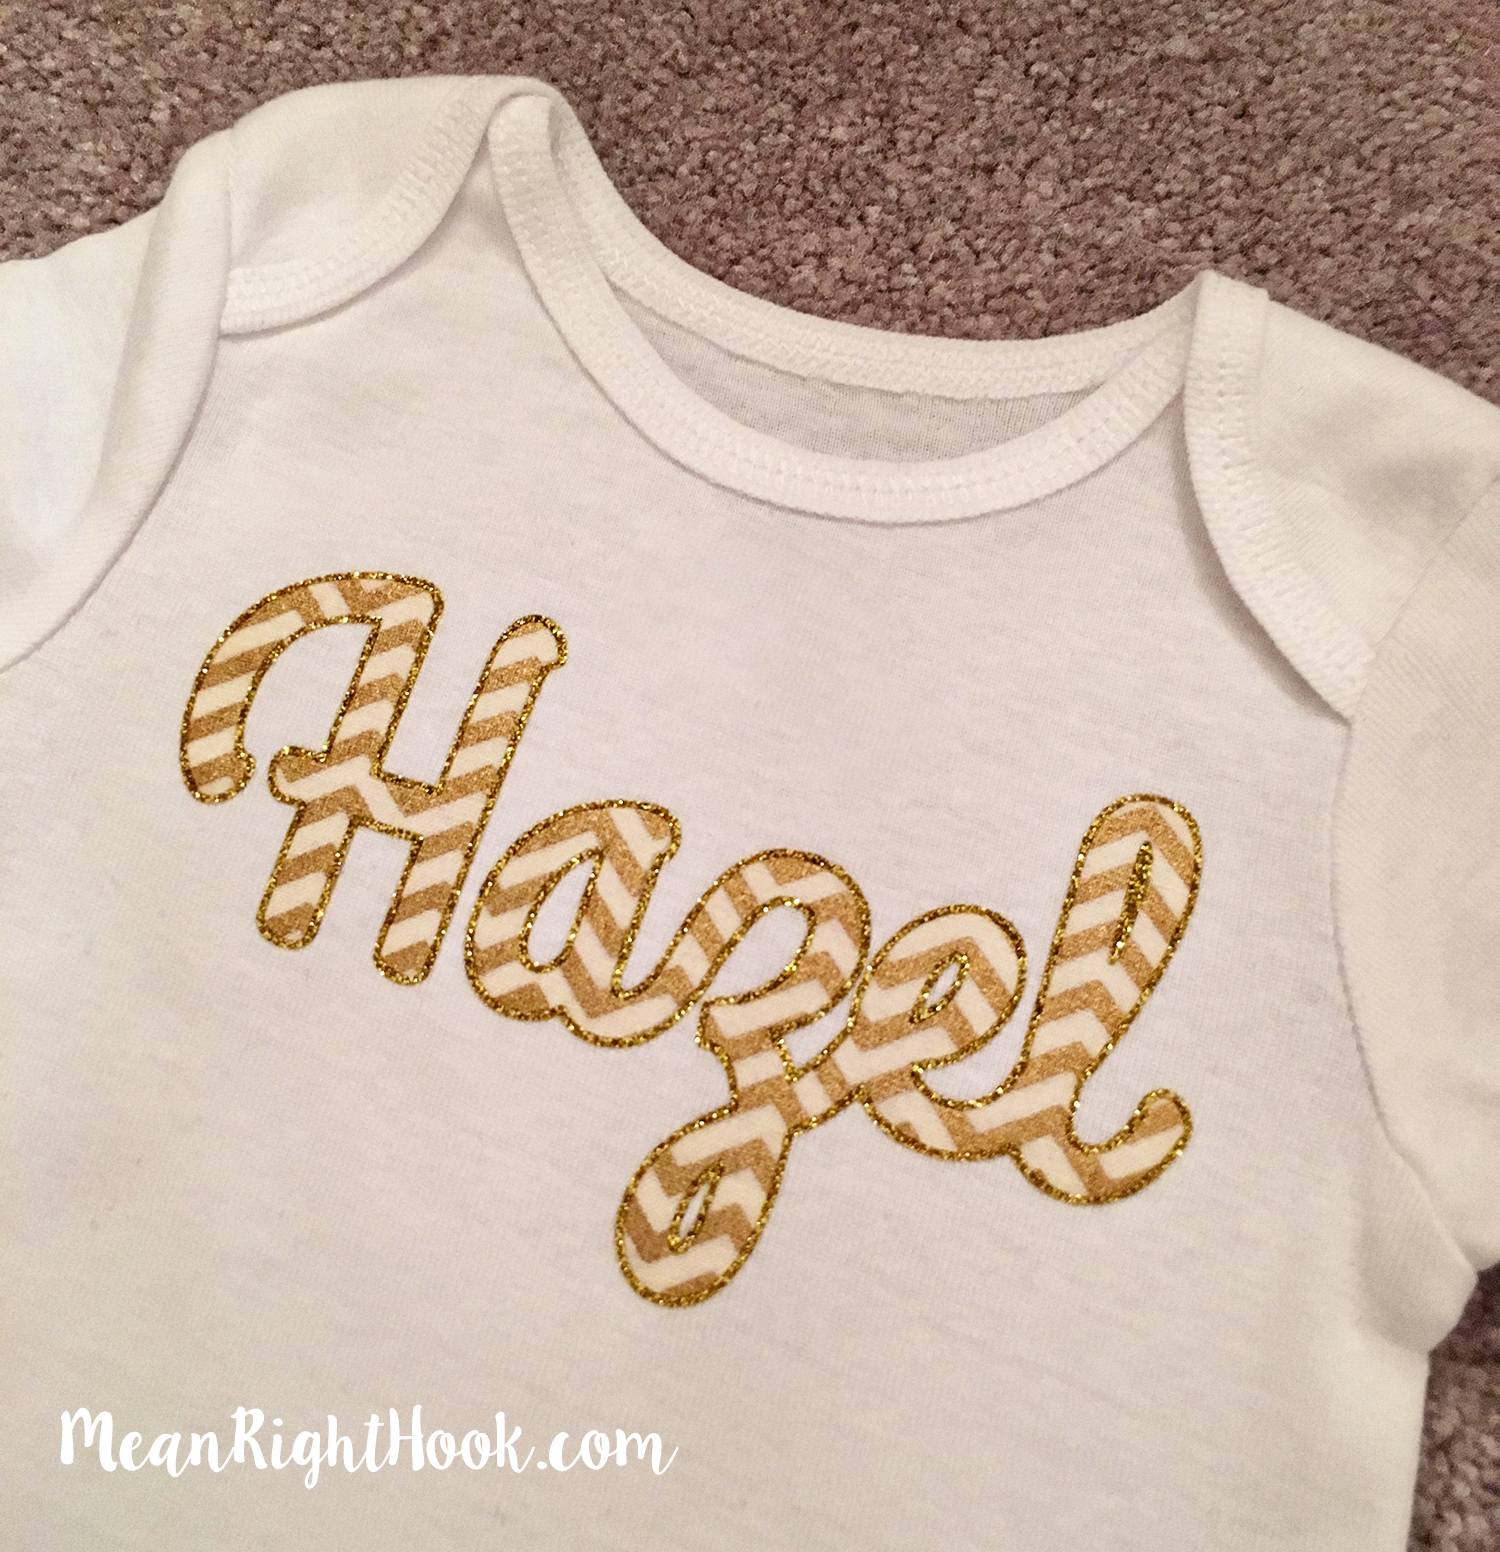
I can’t wait to give this to my friend and her new baby. I’d love to see your fabric projects your make with your Cricut! Or let me know if you have any questions. Just leave a comment below.